Showing posts with label network. Show all posts

Security and IP Cameras

Security and IP Cameras

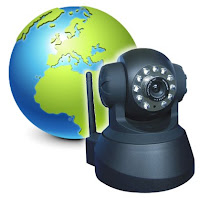
While being a security device by vocation, an entry-level IP camera is rarely secure itself: the embedded server does not offer any way to encrypt your login and the data stream. Fortunately there are ways around it, as well as common sense practice to reduce the risks.


If you're willing to spend 300€+, there are IP cameras with embedded SSL on the market (Axis, Panasonic, ...), but if, like me, you preferred buying 6 cheap chinese ipcams instead for that price, you can only use plain, unencrypted HTTP. Thanks to this lack of security, the role your "security" device can be completely inverted by opening a wide open window inside your home. The dream of any potential burglar planning an on-site visit!

First: the obvious ... restrict the HTTP and FTP accounts to reduce potential damage.
The first thing for any unencrypted access to your LAN is to only use it with a dedicated combination of user name and password that is used nowhere else (not even for the FTP service), so to ensure that if your IP cam login is ever "sniffed" by a hacker, the intrusion will be confined to your camera, and won't extend to your NAS, or computer!
Furthermore, the role of the account used for accessing from the WAN should be limited to Visitor (access to fixed view only) or Operator (access to PTZ control), to prevent any intruder from tempering with the configuration and clearing the traces of his visit in the log (you should inspect the log regularly for hints of unusual access).

The FTP service account: this other login will be easily compromised if you use the same user/password as fort the HTTP server or if you upload picture to an FTP server on the Internet. So the same kind of precaution applies here: use another unique user/password set with limited access to the target server, so the potential hacker won't be able to use that account to pump all your data.


Next: consider solutions to prevent intrusions.

1. If you are only accessing your IP cameras from fixed external locations, consider setting up your home router to allow incoming HTTP and FTP requests from these fixed IP addresses only. This alone will greatly reduce the likelihood of an intrusion.


2. If you have a Network Access Server (or NAS), you may have a choice of options:
e.g., the Synology DiskStation range offers a Surveillance Station to control your cameras through its HTTPS access. In the case of Synology though, you need to purchase extra licences to control more than one camera.


3. Some NAS and routers, come with a VPN server, and this is your best free option.
While PPTP is slightly easier to set up,  OpenVPN is generally acknowledged as faster and more reliable.

To make it work with the outside world, you need to check that you router allows the VPN traffic to  pass through. This option is usually present in the user interface and needs to be enabled.

If a firewall is on, further set up is needed to allow traffic through the required ports.
Generally it is UDP 1194 for OpenVPN, and  TCP 1723 + GRE (Generic Routing Encapsulation, IP protocol ID 47) for PPTP.

Once your VPN connection is working, a tunnel is created between your remote client and your intranet at home (i.e. behind the NAT). 
As a result, every server in your LAN can be accessed just as if you were home.


Therefore, you will now use the intranet IP addresses of your cameras to connect to them, but you'll be the only one to watch!


Read More

Upgrading to Gigabit and Wireless-N

Upgrading to Gigabit and Wireless-N
There are many WiFi-N routers on the market, but add the Gigabit requirement, and this choice drops dramatically. Add a further requirement for an embedded ADSL modem, and you're left with just a handful of candidates left.

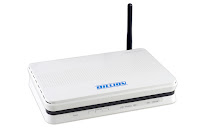
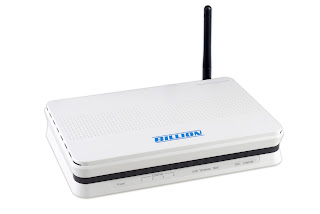
With time, I accumulated devices with either Gigabit or Wifi-n connectivity (Bluray player LG BD390, Synology NAS DS109, Acer Liquid MT smartphone), so I  decommissioned my good ol'7402GXL for the Billion 7800N with WiFi-n and Gigabit capabilities.

There are several reasons -other than just using less power sockets- for preferring an ADSL router with embedded modem, but for sure, this decision reduces the available options. In Europe, this seems to leave Billion 7800N, Cisco WAG320N and Netgear DGN3500 as only possible candidates (all Broadcom BCM6358 chipset-based).
Although I didn't mind trying something different than Billion (just for a change), the unconvincing user reviews on the Cisco and Netgear models pleaded for staying with the brand that I know since 2008 for its reliability and for the quality of its technical support service.

The first  most striking difference in the 7800N compared to the 7402GXL, is the size, about 30% bigger (15.5cm x 23cm).  Next come the obvious addition of 2 antennas and the absence of USB connection for a 3G modem.
The interface is similar to the 7402GXL, except that there's no pre-defined firewall rules so you need to define your restrictions from scratch over the unique "allow all" initial rule.
The chipset is also different: Broadcom instead of Connexan. Apparently it gives a little less options when configuring from the Command Line Interface (like adding port forwarding...).
The Billion 7800N is not really a new router and not the cheapest neither (~130€), but considering its outstanding reliability, it's well worth the money.

The companion router
To be complete, the solution had to include a companion Gigabit+Wifi-N router, to play the role of Wireless range extender.
Since a modem was not necessary here, the choice was larger:
Buffalo WZR-HP-G300NH v2, Zyxel NBG4604, D-Link DIR 645, TRENDnet TEW-639GR and TP-Link TL-WR1043ND
It didn't take too long to opt for the later based on its reviews and price (~50€)


These two guys work perfectly together and all it takes to set up the TP Link router as a bridge is to switch off its DHCP while designating the other router as the primary DNS server. I gave the same Access Point name to both boxes but distinct and non-overlapping Wi-Fi channels. This way, when my netbook or phone leaves the coverage area of one, it automatically connects to the other.


One remarkable feature of this router is the excellent user interface, complete and well structured, with a detailed contextual help for every single option, explaining how and why to use them. Something that Billion leaves to Google.


More info:
Billion Bipac 7800N: http://www.billion.uk.com/product/wireless/7800n.htm
TP-LINK WR1043ND: http://www.tp-link.com/en/products/details/?model=TL-WR1043ND

Demo UI for 7800N: http://www.billion.com/edu/EWAN/7800N_GUI/
Demo UI for WR1043ND: http://www.tp-link.com/simulator/tl-wr1043nd/index.htm


Read More

VPN through Billion 7402GXL

VPN through Billion 7402GXL
Until recently, setting up a PPTP VPN passthrough on my Billion  7402GXL router was impossible, and for once, it turns out it was not all my fault...


Unlike most other routers on the market, there's no specific "PPTP Passtrough" option in the 7402GXL, but the method to allow this on the Billion router is quite simple:

Under the Virtual Server > Port Forwarding section, define a redirection for PPTP port and another for GRE protocol pointing to the intranet IP of the VPN server.


And it the firewall is enabled, define an rule to allow the PPTP port 1723 to go through (In and Out)


In theory, this should have done the trick, but not for me: despite the troublesome firewall being off, the VPN client was still hitting an invisible wall, and there was no log entry whatsoever in the router or at the VPN server end to give any clue.

Resolution
I contacted Billion technical support to check for any newer firmware for my model, which was in 6.22b (which, despite being 6 months old is only confidentially mentioned on the UK forum).
They provided me with the version 6.24b(UK build). It appears to be one of the latest available (January 2012) according to the Australian site (no changelog available).

Once installed, the VPN connection worked immediately with the same set of rules and forwarding.

So, it is possibly a bug that the latest firmware eventually resolved. Of course, it is also possible that resetting the router to factory settings -which is a requirement when upgrading a firmware for Billion's devices- cleaned up something corrupted in the configuration.

Read More

Mouse without Borders

Mouse without Borders

If you're working with 2 Windows computers side-by-side (or more), you will probably adopt rightly this excellent tool from "The Garage" (a Microsoft geeks nest).

It would already be great if it was only a software alternative to KVM's but it also allows you to share your clipboard between computers as well.


In my profession, I frequently experiment on one PC and document the operation on another. I'm using Greenshot to capture screens and save them in a central network location, but sharing clipboard is sometimes better as you can directly copy/paste picture, text, anything...into the final document.
A menu option allows to send a screenshot to, or receive it from, another PC, but you also can use the PrintScreen button (or Alt-PrintScreen) to get the screenshot directly in the shared clipboard without always openning 'Paint'. An option to automatically save the screenshots to file would be a nice addition . 

Installing:
All it takes, is to download a tiny file (1.1MB) and install it on each computer. A security key will be created to associate only the computers you choose. From that point, your mouse will be able to travel from one computer screen to another by just crossing the 'border'. You need to ensure that your screens disposition in the "Machine matric" matches the real situation. If needed, this can be adjusted by a simple drag an drop.


Get "Mouse without Borders" here

With its large media coverage, this tool from Microsoft brings an another software under the spotlights to people (like me...) who didn't know that such a solution already existed for quite some time: Synergy, a Multi-Platform (Linux, OSX, Windows) and Open Source alternative, which is definitely worth a try!


Read More

Indispensable Network Applications for Android phones

Indispensable Network Applications for Android phones


After flashing and re-installing my phone so many times, I found that a few Android applications were worth reinstalling each time. You probably know some of them:
ES File Explorer: not just an explorer, it can contact your PC through Wifi using SMB or FTP. FTP also helps with some car hand free kits that cause pairing troubles.

Penetrate: scans for nearby Access Points and reports the weakly protected routers (WEP, factory password, …). Comes handy on travel when a free Internet access is needed. Note that it requires the huge (200Mb) Thomson dictionnary for cracking some passwords, but this goes on your µSD
Overlook Fing: scans the lan you're connected to and shows a detailed network map. Absolutely brilliant!

APNDroid: a life saver for any user with a pre-pay SIM, allows you to disable the Internet Data traffic. To keep those hungry automatic Internet updates under control. Appears as a Red/green widget push button on your home screen.

Traffic Monitor from RadioOpt GmbH. Beside the included speed test is not yet as good as the Speedtest.net app, its main purpose is to keeps track of exactly what quantity of data is used by each application/service.

Shark: a wireshark compatible wlan sniffer! 
 
TextDroid: while connected to Wifi, will send free text message through the Mobile operator web text engine, the nice thing about it is that it integrates with your phone book.

KeepassDroid: Allows using the Keepass database on your phone (all your logins and passwords strongly encrypted in your pocket)

Android System Info: System, Task and App manager, even system log (for rooted phones)
Read More

How to access your IP camera from the Internet

How to access your IP camera from the Internet
True geeks come usually with 3 major faults:  they don't do backups, they don't quarantine new fishes, and, they never read the manual!

What follows is actually quite well explained in the IP camera manuals, but remains the most frequently asked question:
"How do I access my IP camera from the Web ?" 


Taking from the point where your IP camera is accessible from inside your home network, the very next thing you want is to access it from outside as well, using a PC or a phone, on holiday or at your workplace.

This short guide assumes that your camera connects to a router, the most common scenario, so the ADSL and DDNS settings of the camera itself are not used here. All the job will be done on the router. If you do dial-up from the camera, you can still quite easily transpose the instructions below to your case as soon as you get the idea.

1. Dynamic DNS setup
While not vital, using dynamic DNS service will make your life easier. Without it, you need to know what external IP address your ISP assigned to you and use it as part of the url to access your network from the outside (http://10.11.12.13). This IP address is likely leased for a limited time and subject to change, so you'd need to keep track of it.

Upon registration, the dynamic DNS service will give you a list of domains to choose from, and will map it to your external IP address.

The router will interact with the dynamic DNS service to update it with any IP address change. Most routers have a dedicated section where to enter your Dynamic DNS account details.

First thing to do, is to retrieve the section dedicated to DDNS setup in your router configuration and check what choice of DNS service providers it available (PortForward.com has screenshots from many routers to help you locating the right setup page for your model.), this varies from manufacturers, but almost all will support the most popular one: dyndns.com.  Pick one available and then go to their corresponding web site to create an account.

In this example, we will choose to map our external IP address with http://mylab.homedns.org


You will be told if the name+domain name combination is already taken and will have to choose another one.

Once this is done, you just need to enter your login and domain name into your router:
Your router will now keep dyndns automatically updated with any ip address change.
 
2. Port forwarding
Now that  the url http://mylab.homedns.org leads to your external address, you still need to tell the router where this incoming traffic will be redirected inside your lan.

In this example, suppose you have the following devices in service:

IPCam1 on 192.168.1.100 using port 80
IPCam2 on 192.168.1.101 using port 80
  NAS  on 192.168.1.102 using port 80


The port forwarding will just tell to which of them the incoming traffic will be forwarded.

Here, if we want http://mylab.homedns.org to lead to the internal http://192.168.1.100, we need to set this up in the router as follow:

The port forwarding section is generally located in the Virtual Server category of the router.

Again, portforward.com will help you find the right section on any router model.

You can setup several port forwarding entries so the other devices are accessible as well, but the incoming port needs to be different for each of them:

- incoming http://mylab.homeftp.org:81 goes to IPCam2 internal http://192.168.1.101(:80)


- incoming http://mylab.homeftp.org:82 goes to NAS internal http://192.168.1.102(:80)


Please note: For the port forwarding to work consistently, you must assign fixed internal IP addresses for your devices in the router's DHCP table. Make sure also that your router firewall doesn't block the incoming traffic on ports used.


3. Multi-device setup
IP cameras like Foscam offer the convenience to access up to 9 ip cameras through the interface of one.
If you use this feature, you probably entered the internal ip addresses in the Multi-Device section of the ActiveX configuration interface.
So when connecting from the Internet, you will realize that only the master camera is accessible and the others can't be viewed, and show a steady yellow dot in the device status section.

To sort this out, you need to go back to the multi-device setup and replace the internal IP addresses by their respective DNS paths and ports.


For your intranet usage, if you don't like the idea of that traffic out-and-in, you still can configure the multi-device section of your other camera with the internal ip addresses and use this one at home.

Additional reading (from DynDNS.org)
Routers and Port Forwarding
Open Port tool 
to check if some ports are blocked by your ISP.
Read More

Synology DS109 NAS

Synology DS109 NAS
I became increasingly concerned by the safety of my data after that some loss and corruption occurred on my NexStar LX NAS, apparently following episodes of heavy disk activity. I'm still not sure who to blame: the NAS or the old Seagate Barracuda inside.

So, I had in mind to find a new NAS and hard drive in the next few months. I first saw the QNAP TS-109 on DealExtreme.com, which gave me an idea of what the ideal NAS should be: something more than just a hard disk enclosure with some SAMBA, FTP and BT agent, but rather an always-on, multi-purpose server to second my 10 years old patch-worked computer. I found very attractive the mySQL and PHP enabled web server, and the secure HTTPS and SFTP connectivities. Thanks to the users comments on DX, I realized that this model was both outdated and overpriced.
The successor TS-119 Turbo (priced around €250) with its superb Ajax web interface looked even more appealing. But then I discovered its most direct competitor, the Synology DS109 and none of them would have been a bad choice really.
What decided me in the end was an offer on a German shop for a Synology DS109 @ €234...including a 500GB Hitachi DeskStar hard disk! Their all-but-friendly ordering system was a pain to deal with but it was really worth it!

One week after receiving their "shipment tracking email" ...with no tracking number, the package arrived.


First surprise, a small bag of sweets was included in the package. That's nice, I'd have preferred that easy-tecs.com reply to my emails (about the missing tracking reference), but at least they try to add a friendly touch to the process.


Upon opening the NAS by removing 2 screws and pushing the upper part forward, I could see the promised hard disk already in place. 


 I am using it for a few weeks now and this little gem really delivers. The management interface is extremely clear and simple in all aspects. I could even use the Surveillance Station with one of my FI8908W IP cams. I say one of them because, for each additional camera configured (up to 8), you have to buy a license, and it cost roughly the price of my camera, so it's just plain non-sense for me. Also, as there is no camera profile for the Foscam models, the Pan and Tilt cannot be exploited .

I had one annoying problem though with this unit:
- I wanted to use the USBCopy feature to recover the content of my old NAS. The copy process started normally but stopped some time after with the log entry "USB drive ejected".
 The Synology tech. support proved helpful and responsive, and we could finally blame this on the few bad sectors present on the source. Synology R&D team confirmed that bad sectors couldn't be skipped (which is not normal: I could backup my old NAS through USB on my PC w/o problem) and promised to look after this in a future update.


Pros:
- Very simple to use despite the large choice of features
- Clear and nice Ajax interface
- Silent and low energy (9-19W)
- Reactive technical support


Cons: 
- Synology agent may not always find the DiskStation on some PC's
- USBCopy fails on bad sectors instead of skipping them.
- Additional camera license cost the price of an actual camera!


More stuff on Synology DS109:

Synology Download Center
3rd-party Apps integration 
Ajax interface overview
Read More

A small linux-based wireless storage

A small linux-based wireless storage
Linux-based Wireless storage
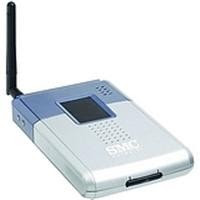
I must confess that I bought this item by mistake: I expected this tiny wireless storage to be the perfect companion for my DVR (Digital Video Recorder). But I neglected to ensure that it would have a USB Host type of port, and it's not the case. So it cannot act as a flash drive for the DVR, if you follow me.

Still, it's a nice device: small enough, using a 6.3cm (2.5") hard drive, and running on a mini linux OS (telnet access to it can be enabled). Mine came as a SMC WAPS-G flashed with the latest WMU-6000FS firmware from Ovislink. This brand offers a convenient download manager (BitTorrent, HTTP and FTP) as part of its embedded software and while it's not exempt from bugs and typos, it does the job quite nicely, sending you an email when the download is done. Last seen just below €50.- (without the hard drive).

The site macsat.com and its wiki are the places for push the limits further with custom firmwares. However, you should decide if you really need those additional features and make yourself familiar with the recovery techniques (jtag) beforehand as it seems quite common to end up turning that wi-fi storage into a useless brick.

Pros:
+ affordable storage solution
+ mini Linux kernel on board
+ highly tweakable
(source codes are available from some manufacturers)

Cons:
- Official development abandoned (latest fw dated 2007/12/07)
- Disputable reliability
- Some bugs


See also:
Hacking MGB100

Other known clones:
Level-One (WAP-0007), Comet Labs (MGB100), Conceptronic (CHD2WLANU), Micronica (MGB100), Safecom (SWSAPUR-5400), Pearl (PE6643)
Read More

Network Notepad

Network Notepad
I was looking for a simple way to create a nice map of my network at home. While not so big, it grew fast with the addition of various wifi-enabled devices in the last years.

A colleague brought my attention to a freeware called Network Notepad.

I initially overlooked it as being too basic, but it turned out to be actually exactly what I needed: not too big (about 3 MB), not too simple either.

This tool allows you to create an interactive map of your network elements: it is possible to access the network elements (ftp, telnet, http, ...) by selecting their corresponding icon. You can also define custom actions (like launching the CDP Tool).


The icon library may seem somewhat incomplete but, once you discover how simple it is to create your own, this little tool really starts to stand out of the crowd.

All you have to do is to open the object libraries window,
go to File menu > New, and paste pictures of your choice into the empty library space. The object library allows to resize the elements to a proportion suitable for use in a diagram.


Nice alternative:
Draw Anywhere is a Flash based web application to achieve a static diagram. There's is no installation, and the free registration is optional. It also allows you to add your own images.
Read More