Showing posts with label fi8904W. Show all posts

A point regarding the Foscam recovery files

A point regarding the Foscam recovery files
I published my post, Bring your paperweight back to life, in December 2009 with recovery files received from Foscam at that time.

This worked fine for all users of FI8908W (and FI8904W) until some hardware revision that occurred in Foscam's produced during 2010. The initial files didn't work any more for these newer cameras.

I have updated my post with files (+ mirror) that Foscam confirmed to be compatible with all the generations of FI8908W and FI8904W.
I therefore removed the old files from the post to avoid any confusion.

If you went to that page before, please note that the instructions have been updated as the system file is now must be uploaded to 0x7f0e0000 instead of 0x7f0d0000.


I've received a new set of instructions and recovery files for FI8918W (and latest hardware revision of FI8908W)


Read More

My first FI8904W! (Outdoor IP camera)

My first FI8904W! (Outdoor IP camera)
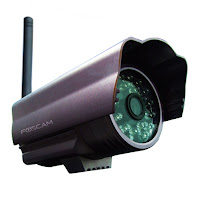
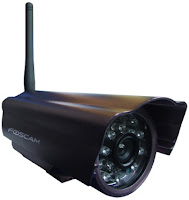
Since there is no suitable solution to place one of my FI8908W outside, I decided eventually to go for a proper outdoor IP camera.

So I ordered a FI8904W and decided I'd become a bit more knowledgeable about it by giving it a thorough inspection on arrival.


This camera came with standard 6mm lens (8mm, 12mm and wide-angle 3.6mm are also available according to the description the box)
The manufacturing date is October 2009 so it comes with the firmware 11.14.1.46.
It also exists in different colours. According to the box, mine is "Coffee".
I ignore what substance you must ingest to see purple coffee, but someone in China's got the secret...

So my first experiment was to see if I could change the lens, with a wide-angle from my 6-lens pack (found at DX). While these lenses leave a unsightly gap in the indoor FI8908W, they fit the FI8904W perfectly.

It is not visible but the front of the camera can be unscrewed to access the lens compartment. It takes some grip but eventually will come off nicely.


Before you go ahead with removing the lens, check first for that tiny screw on the side of the lens base.
See it?  It's there to keep the focus locked. You need to release this guy a few turns and then only can you safely unscrew the lens anti-clockwise all the way.


Pay attention not to lose the rubber ring that isolates the lens chamber from the electronic components.


I picked the 2.8mm lens and screwed it in (with the rubber ring) until the focus was ok. I was lucky with this focal but apparently, other don't give good results at all, so you need to experiment.


A quick look inside

Opening the rear part of the camera just requires to unscrew the large hexagonal ring around the wire, then unscrew all 4 small hexagonal screws, which will void the warranty of course (in my case it would cost the price of the camera to ship it back to the reseller anyway...)


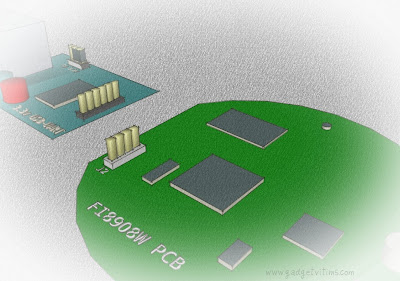
What I wanted to find is located on the main pcb: there's a jtag port (marked J2). As for most recent cameras, the pins are no longer present but, with a proper solder, it will be possible to make a serial connection and, if it gets bricked one day, perform the recovery operation previously explained in this article (same recovery files apply).


Below is a comparison between the factory lens and the 2.8mm lens field of vision.


Night vision (2.8mm):
Read More

Start up guide for new wireless IP camera users

Start up guide for new wireless IP camera users
The information in this post may seem very basic to people who have a wireless IP camera for some time, but, we all tend to forget how confusing and frustrating our first steps may have been setting up these gadgets the very first time.
I'll try to second the network settings chapter in the IP camera manual  (even though a true geek never reads the manual) to help passing the blocking points of the wi-fi setup procedure.
This is based on a Foscam camera but can certainly be used with other wireless cameras.

The step that nobody has problem with (usually) is connecting the camera to the network with the Ethernet cable. When this is done, the wireless settings can be accessed from the Administrator section and that's where a first very common error is made:
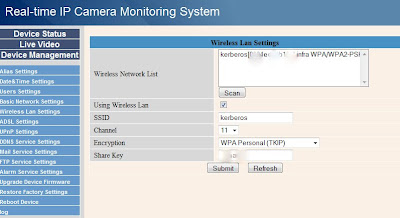
Many beginners enter an arbitrary name in the SSID field, thinking it will identify the camera on the network. What is needed here, is the name of an access point (typically your wi-fi router).

Also make sure that you choose a supported encryption and prefer WPA to WEP if possible. The channel should also match the one used by the router.


In the most recent firmwares, there is a scan button to detect available access points automatically. If nothing appears after scanning you may need to click the refresh button.


The next step is often unclear as well to newbies: once you click on the Submit button, the camera will start a countdown of 30 seconds to restart. This is the moment to unplug the Ethernet cable. You should have done this within 10 seconds, on FI8908W, it is typically before you hear the short click from the camera speaker preceding the initial rotation sequence. The camera will start looking for a network and, at the condition that there is no more Ethernet connection, a wireless access point will be searched.


If everything goes well, after a few seconds, the green led will the blink much faster than before, indicating that it achieved a wireless connection.


The final step is to check your router's DHCP page for any incoming request, this is likely to be your ip camera (If nothing appears, ensure that you disabled the MAC filtering on your router for the time of the procedure).Just use that ip address in the url of your browser to confirm it is what you expect.
You can then add this address to your static DHCP list and MAC filter exceptions.


Note: The camera needs the router to be in broadcast mode in order to connect, otherwise it will not find the AP. This limitation has been reported to Foscam.


Read More

FAQ for IP Cameras

FAQ for IP Cameras
Below is a compilation of the frequently asked questions on IP cameras subjects found on this site.
While they initially apply to the model fi8908w from Foscam, they are susceptible to be of interest for other models and brands.


This FAQ is complementing the troubleshooting section present in some manuals, like IPCAM user guide 4.1.2 - mirror

-1-
Q. I can't access to my camera wirelessly!
A. A common mistake is to setup an arbitrary SSID in the wireless settings and expect to connect to the camera from a PC with wifi dongle just by looking for that SSID. In fact, the camera needs to connect to a wireless router to be usable wirelessly, so this SSID field in the camera settings must match the routers SSID. You must enter the appropriate parameters to allow your camera to connect to the router.
A #2. Foscam models usually don't deal well with long/complex  (with symbols or accents) SSID's and shared keys, so keep them simple and short, unless you have a FI8918W with a firmware 11.22.2.36 or above.


-2-
Q. No Image: The camera's web page opens but only the controls are displayed and the camera view remains black. Sometimes a message "Disconnected by user" appears.
A.1. This commonly occurs with this kind of AX controls. By default, Internet Explorer security settings prevents unsigned ActiveX controls from being used. You need to enable the option "Download unsigned ActiveX controls" under the security properties of IE. For increased security, add the camera url in the Trusted Sites and change this security parameter only for this zone.


A.2. Another common cause is the Anti-Virus blocking your ActiveX control as well (In my experience Avast would do that without any notification). You need to enter the camera IP address in the appropriate exception field of your anti-virus settings. If it's safe to do so, consider specifying the whole subnet as an exception, so the problem won't come back next time your camera IP address changes.


-3-
Q. Email Alert settings: I can't get the camera to send the emails alerts to my Gmail inbox. Why?
(Getting error: Test  ...  Failed Can not connect to the server)

A. Gmail requires encryption for its default SMTP server. This is is often not supported by ip cameras. So the solution is to use a non-SSL SMTP server. Many ISP's provide such free SMTP service with no authentication required and that can be used to fill the "SMTP server" field. you can also try this free non-encrypted SMTP address provided by Gmail: gmail-smtp-in.l.google.com
Gmail sender and receiver addresses are independent from the SMTP server used.
FI8918W only: TLS support has been added in fw 11.22.2.36.

-4-

Q. How to prevent the camera from looking at the ceiling after a reboot?
A. The default behavior of a PTZ camera such as fi8908w is to perform an initial rotation when starting. At the end of the boot up test, it returns to a center position that is slightly pointing upward.
In the case of an unexpected reboot, after a power failure for instance, the area that you assumed to be covered by the motion detection will actually no be watched anymore.
To overcome this, you can use the following command so the camera will not move during the reboot phase:
http://IPCamURL/set_misc.cgi?ptz_center_onstart=0

Update: since firmware 11.14.2.17/WebUI 2.4.8.14, it is possible to set this from the user interface, by clearing the box next to "Go center on boot" in the PTZ Settings section.

-5-
Q. Is it possible to turn off the green led?
A. Yes, it is possible for FI8908W since firmware 11.14.1.43. An option to disable the activity led has been added under the Basic Network settings section.


-6-
Q. What does the activity led blinking rates means?

A. There are 3 blinking rates:
Slow blinking: is seen during the boot sequence, while the camera is searching for an network.


Fast blinking: indicates that the camera is connected through the Ethernet port


Faster blinking: indicates that the camera is connected through Wi-Fi.


The steady green led (no blinking) is something you hope to never see. Check next article.


-7-
Q. Is my ip camera really bricked?
A.The first sign of a bricked FI8908W camera is that it does not perform it's initial rotation at start anymore (unless this was disabled by article #4 above!). Also, if the activity led is lit without blinking. Make sure that the IP Camera tool can't find it anymore whe connected directly to the Ethernet port.
It may have taken a new IP address: On the router, remove its old DHCP fixed address if any, turn off the MAC filtering and see it there is any incoming DHCP request.
In most cases, the camera that got bricked was not a compatible Foscam device. Check posts about Foscam on this blog for indications of a fake or non-compatible camera (sometimes difficult to distinguish).
Best way to brick a camera is to flash it over the Wi-Fi connection. It is highly recommended to always flash the camera through the Ethernet port.
In some cases the camera can be recovered by a last chance operation explained here.

-8-
Q. How to send the camera videostream to VLC player?

A. In Media menu, go to Open Network Stream, then put the following url in the address field:
http://ipcam-url:port/videostream.asf?user=username&pwd=password
If the user and password are not specified in the url, they will just be prompted during the connection.
Note: videostream.cgi can be used instead of videostream.asf but it will only stream video (no sound)

Usage:
/videostream.cgi[?user=&pwd=&resolution=&rate=]
/videostream.asf[?user=&pwd=&resolution=&rate=]

Parameters:
  resolution:(8:320*240,32:640*480)
  rate: 0-23
    0:maximum
    1:20 fps
    3:15 fps
    6:10 fps
    11:5 fps
    12:4 fps
    13:3 fps
    14:2 fps
    15:1 fps
    17:1 fp/2s
    19:1 fp/3s
    21:1 fp/4s
    23:1 fp/5s

Typical url in Firefox or Chrome would look like this:
http://user:password/ipcam-url/videostream.asf?resolution=32&rate=15

Typical VLC command line:
vlc -vvv http:/user:password/ipcam-url/videostream.asf?resolution=32&rate=15 

-9-
Q. Internet Explorer 7/8 crashes upon loading the IP Camera interface.
A. This can be caused by the IE8 Data Execution Prevention (DEP). The workaround is to clear the option Tools > Internet Options > Advanced > “Enable memory protection to help mitigate online attacks" in IE settings (Administrator account is required).


-10-
Q. Additional cameras defined are not accessible from the Internet
A. If you intend to access the camera defined in Multi-device settings from the Internet, you need to enter their external url and port that you would use to connect to them individually from the Internet.


-11-
Q. How to factory-reset my IP Cam?
A. Start with the camera powered off.
Keep the reset button pressed while re-plugging the power cable. Keep the reset button pressed for up to 20 seconds. On a PTZ camera, you know that you can release the reset button when it starts moving and the network indicator starts to blink.
The Foscam camera should now be back to factory default with user "admin" and no password. Since the IP address is reset as well, it may not appear on the network. Use the IP Camera tool to access it.


-12-
Q. No Picture attached in the Email sent by the Alarm function
A. Check the camera Alias under Device Settings. It should be kept short and simple and have no special characters. (Thanks to Matt and Fabrizio)


-13-
Q. No or interrupted Wi-Fi connection 
A. A popular cause is the WPA key that is too long. Keep things simple, define a shorter key. In some other cases the internal wiring to the antenna of the IP Camera is faulty and might need to be soldered properly. If you get a consistent connection only when the camera is sitting just beside the router, then this last point might be the problem.
.
Read More

Firmwares for FI8904W and FI8909W-NA

Firmwares for FI8904W and FI8909W-NA
Each Foscam camera model needs its own specific firmware. Latest versions I could obtain for FI8903W/FI8904W and FI8909W-NA are found below. They all implement the Server Push mode.

Please check your current firmware version first. If your camera was recently manufactured, you may already have the latest one. If the numbering sequence of your version is different, consider that you may not have a Foscam camera and avoid using these files, they would brick your device.
Never flash your camera 'over the air', use the Ethernet connection during this operation! Always start flashing the system firmware file (starting by lr_cmos...), then the web ui file (if necessary).

If you need a version that is not available here, just email Foscam with your device ID.


FI8903W(18 IR LEDs)/FI8904W(24 IR LEDs):
Since March 2010, the latest firmware can be downloaded directly from Foscam download center.
Firmware 11.15.2.17 - web ui 2.4.9.14 (MD5 - DF3DC037603C04757E5E98B719005AA2) 
Firmware 11.15.1.46 - web ui 2.4.9.12  (MD5 - D33FA1CFC8F1E1E85AA2D6837393E8A3)
Firmware 11.15.1.42 - web ui 2.4.9.11  (MD5 - EBDC797117177AD1C7C0D2BBCEF816FE)


FI8909W-NA:

Since March 2010, the latest firmware can be downloaded directly from Foscam download center. 
Firmware 11.13.1.42 for FI8909W

See the FI8908W Firmware History Page for more information on fixes and enhancement between firmware versions.
Read More